Npm Aws-s3 Upload Json Object to S3
A Complete Guide to Upload JSON files in Amazon S3 using AWS Lambda
For uploading files in S3, we have to follow some steps. Let's commencement doing these steps.
Create S3 Saucepan
The starting time stride is to create an S3 saucepan in the Amazon S3 Console click on the Create Saucepan button. You lot volition redirect to this page.
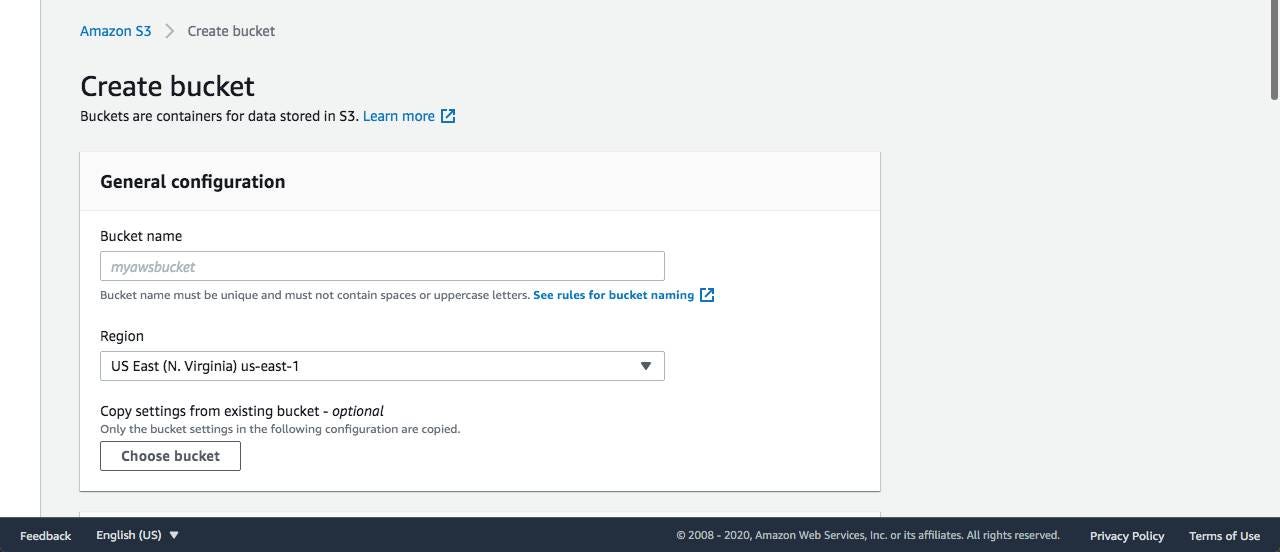
At present enter a name on the Bucket proper name field. And then coil down you lot will meet the Xanthous Create saucepan button click on that. It will create a bucket for you and you will come across it on the list.
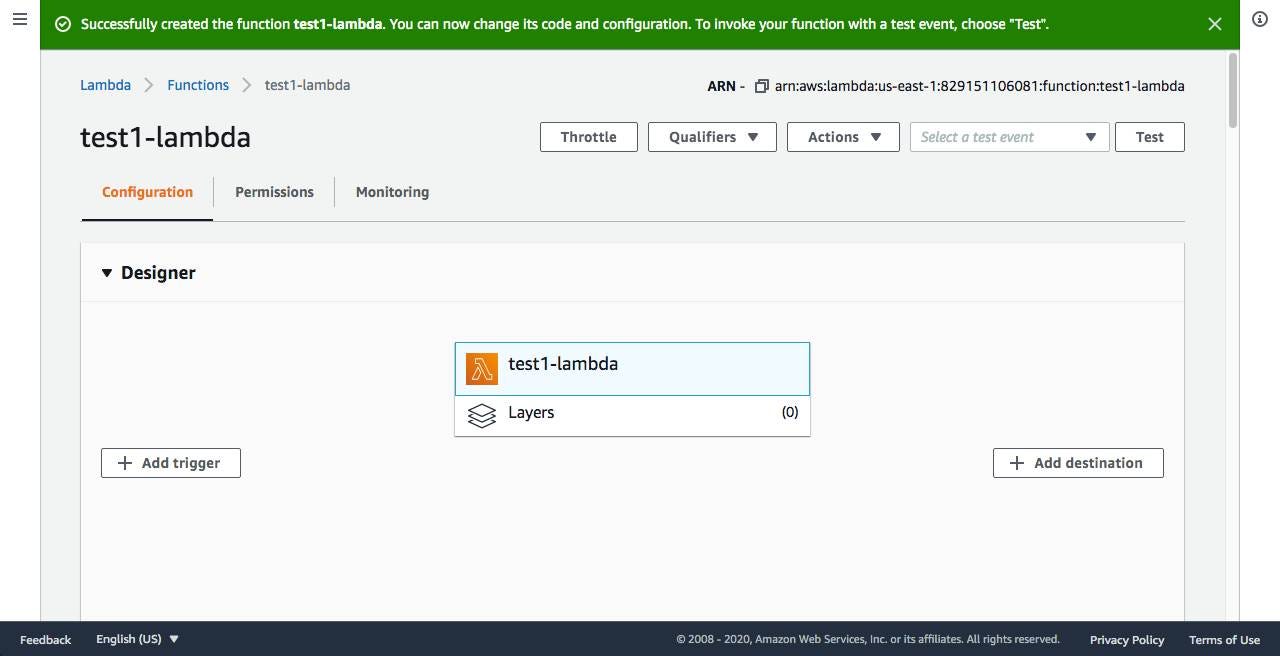
Create a Lambda part
Create a Lambda function in the AWS Lambda Panel click on the Create Function button. Yous will redirect to this page.

Enter part name inside Role proper name field. If yous have already created the lambda function so yous can select Apply a blueprint. If you lot don't have you take to select Writer from scratch and gyre down click on the Create function button. You will see something like below.
Create a project
Open your terminal and enter the following command.
$ mkdir lambda-tutorial && cd lambda-tutorial $ npm init -y $ npm i aws-sdk $ touch index.js
By inbound those command it volition create a project and install the aws-sdk package also alphabetize.js file. Which will need for creating logic on code. Now open the alphabetize.json your favorite code editor. For example, you desire to open with the VS Code. Enter the following command. You tin can employ Atom, Sublime text for this.
$ code ./index.js Now in this file enter the following code.
          const AWS            =            require('aws-sdk');          const s3            =            new            AWS.S3({
                          accessKeyId: 'YOUR_ACCESS_KEY',            // replace with your access central
              secretAccessKey: 'YOUR_SECRET_KEY',            // supplant with your secret   key
            });                      exports.handler            =            async (result, context, callback) => {
/*
            HANDLE Information WHICH ARE SENT FROM CLINT APP.
            HERE I Only ADD STATIC Information
*/
            const s3Bucket            =            'YOUR_BUCKET_NAME';            // supplant with your bucket name
            const objectName            =            'helloworld.json';            // File proper name which you want to put in s3 bucket
            const objectData            =            '{ "message" : "Hello World!" }';            // file data you want to put
            const objectType            =            'application/json';            // type of file                                              try            {                                    // setup params for putObject
            const params            =            {
            Bucket: s3Bucket,
            Primal: objectName,
            Torso: objectData,
            ContentType: objectType,
            };                      const upshot            =            expect            s3.putObject(params).hope();                      console.log(`File uploaded successfully at https:/`            +            s3Bucket            +            `.s3.amazonaws.com/`            +            objectName);
            }            catch            (mistake) {
            console.log('error');
            }
};
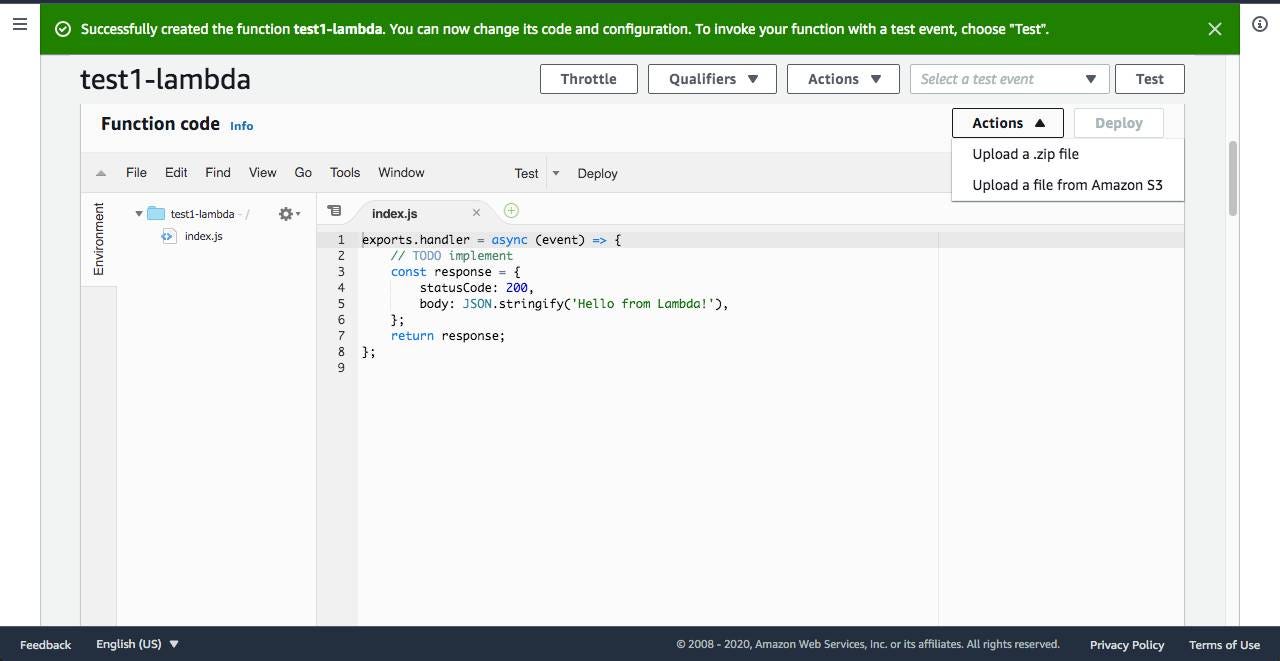
Deploy the code on the Lambda
At present nosotros are going to deploy our code to the lambda function. We need to convert our project to zippo format. Afterwards making a zip, go to AWS Lambda Console and select the function we are created in pace-2. You will redirect to this folio.
Scroll down to the Function code section. Click on the Actions button and select upload a .zip file and upload the zip file you created earlier.
After updated successfully you will see code on the editor. At present y'all volition see the Deploy button beside the Actions button. Click on the Exam button and create Exam. Subsequently creating, test once more click on the Examination button. Then you will meet a log like this.

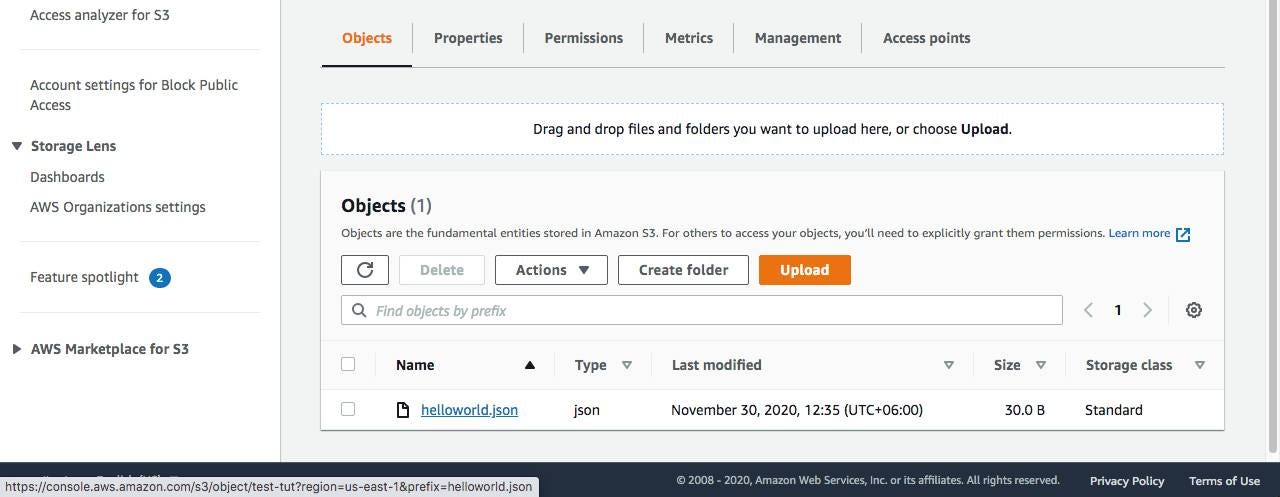
Also, you tin can confirm this it is successfully added or non. Go to Amazon S3 Console select the saucepan y'all take created. In the Objects section, you lot volition encounter similar below paradigm.
Now nosotros want to call our lambda function from the client app. To practice that nosotros have to do the following pace.
Create an API using AWS API gateway
Become to Amazon API Gateway Panel and click on Create API and so select HTTP API there you will find the Build button click on that. Now y'all accept to follow iv steps to create an API.
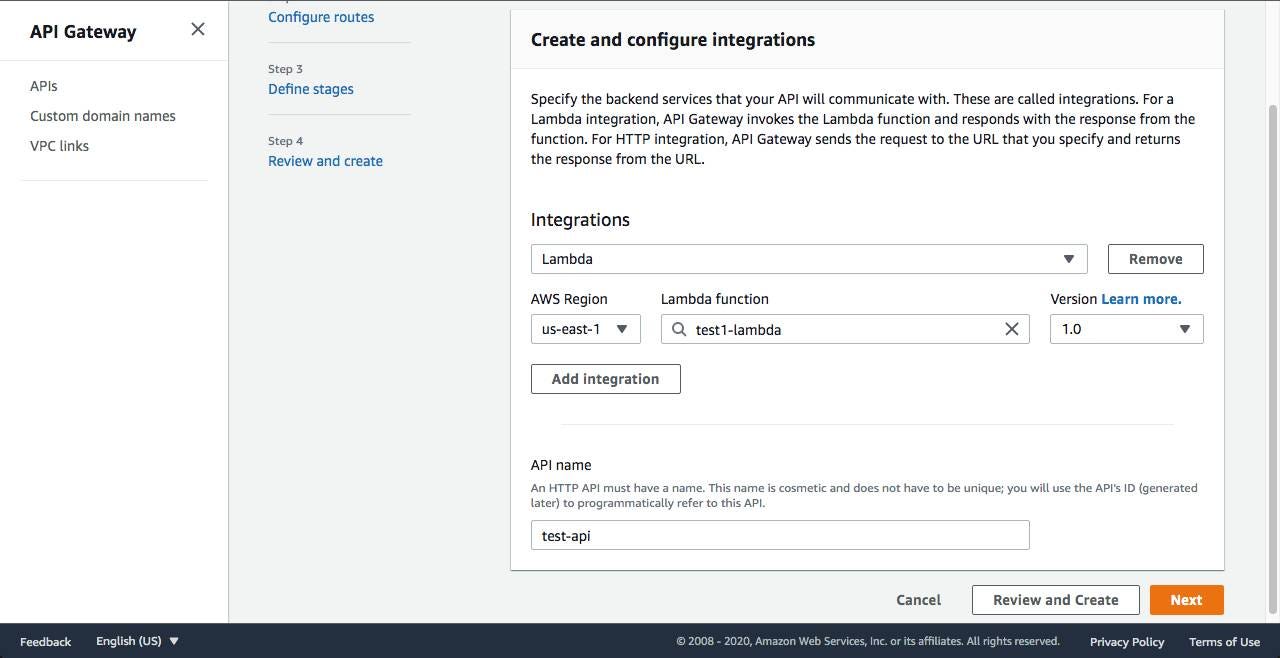
Pace ane. Enter the API proper noun. Also, select integrations as lambda and add the lambda part we have created.
Step 2. Select a method and add a path for the API.

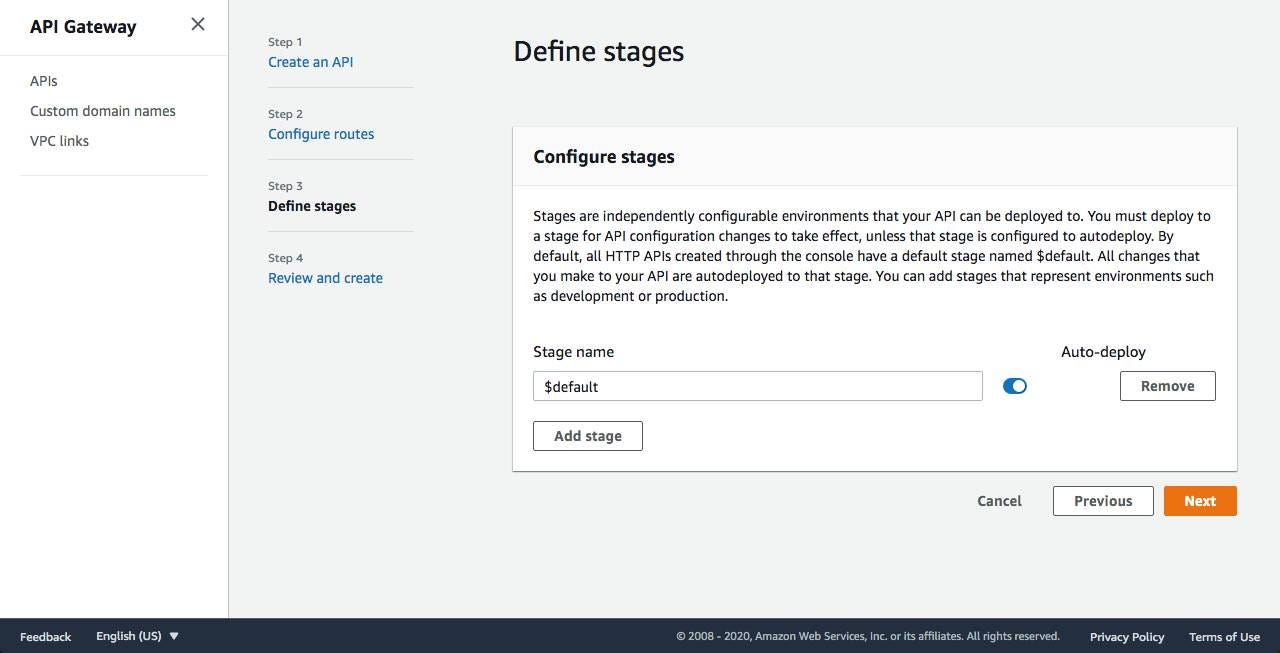
Step 3. Define a stage for the API. For this tutorial, I don't demand any stage. For that reason, I am keeping it equally default. If you need y'all can add together.
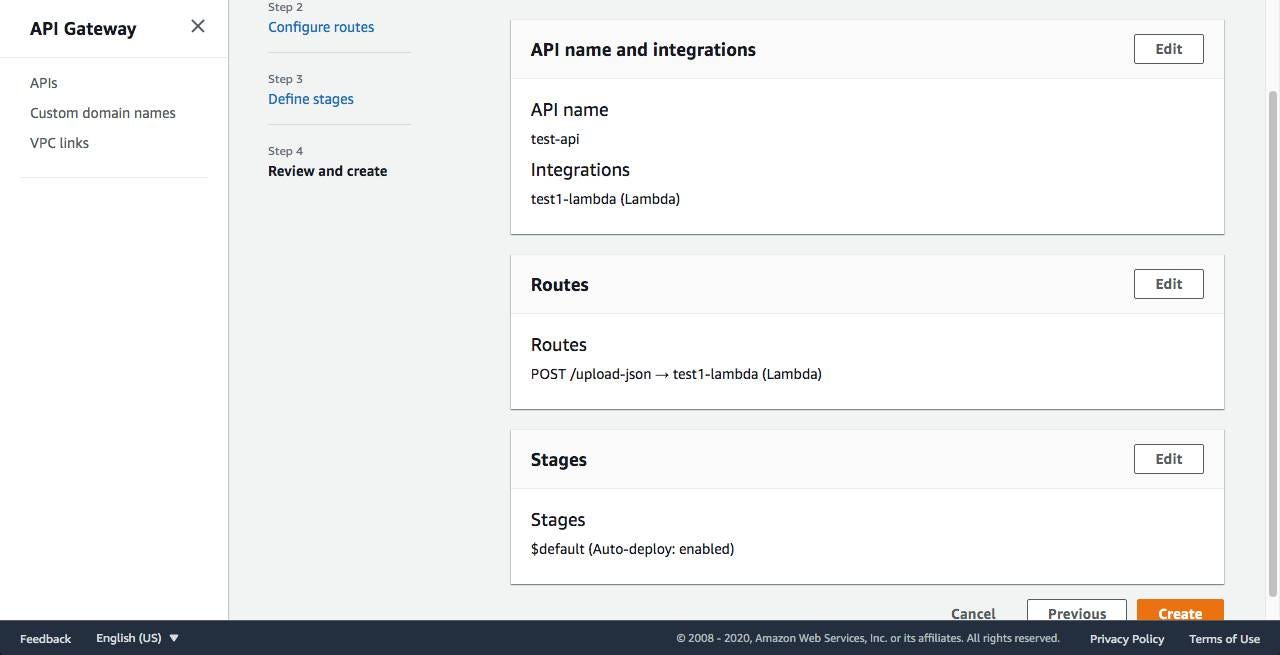
Stride iv. Review everything is right or non. If not, yous can edit by clicking Edit button.
After completing those steps properly, at present click on the Create button. Information technology will create an API for you and that API employ back-end as a lambda function which nosotros take specified. At present you will see something like below.
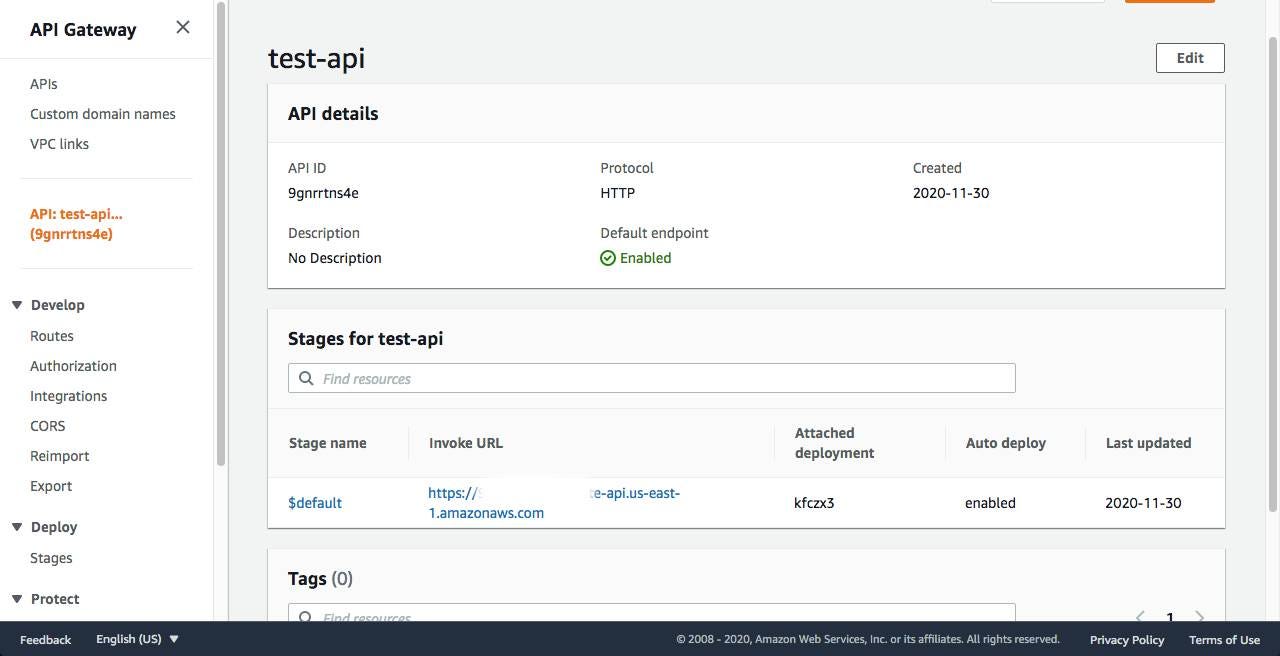
At present copy the invoke URL. Which will need for our side by side step. We have to exercise another thing, that is our client will from the different domain for that reason we have to enable CORS. To enable CORS, go to Amazon API Gateway Panel select the API which you have created. From the left nav, on the Develop section click on the CORS tab. Y'all see like below.
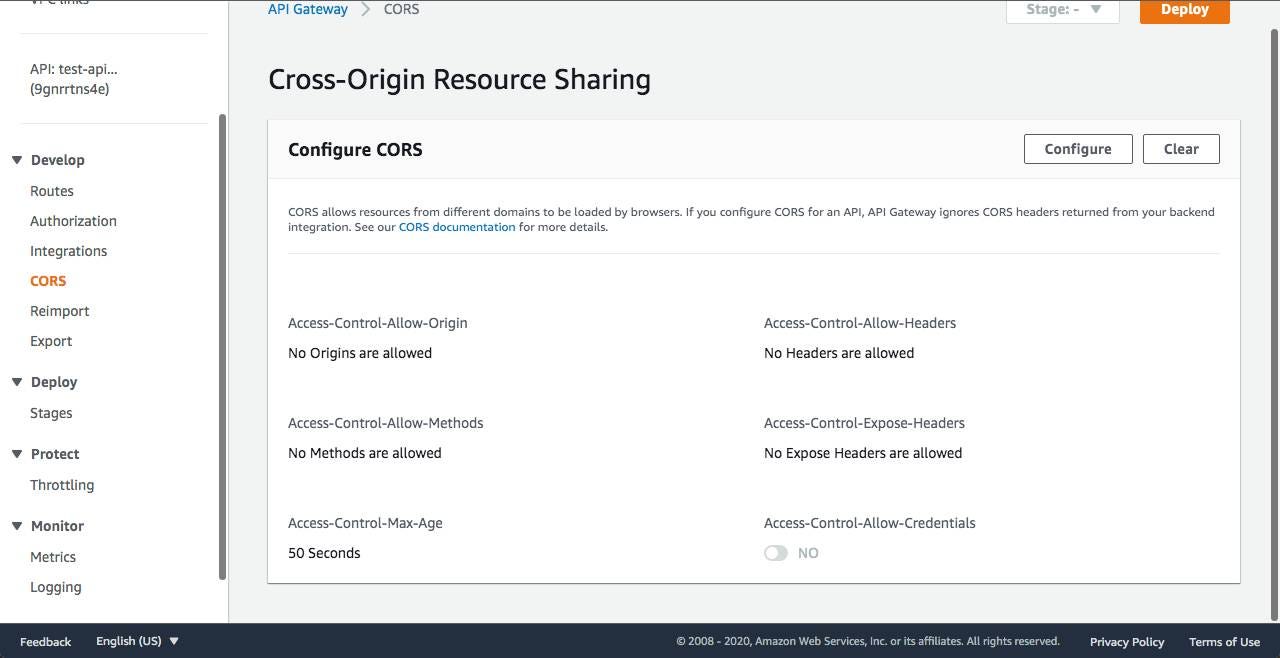
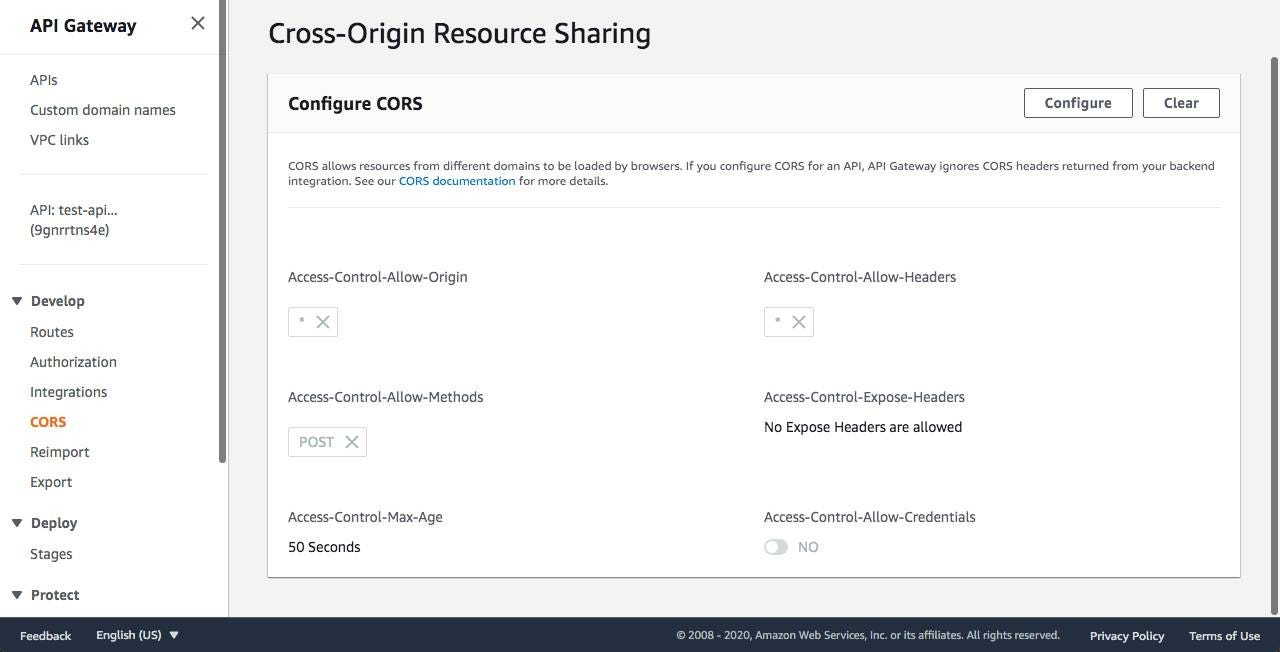
Now click on the Configure button and add which origins, headers, methods are you desire to be allowed. For this tutorial purpose, I am adding something below. Y'all tin customize as your need.
Build a Client App
At present nosotros are going to build a client app using ReactJs. Let's start.
$ npx create-react-app call-lambda && cd call-lambda You want to make a request to our API to call the lambda function. For making requests we will use axios package. To install information technology enter the following command.
$ yarn add axios or, $ npm i axios
Now open the App.js file and add the post-obit code inside the file.
          import React from 'react';
import axios from 'axios';          function App() {
            const api = 'YOUR_URL'; // enter the URL copied from prev. step
            const data = { name: 'Jhon Doe', age: 40 }
            const handleClick = () => {
            axios.post(api, data)
            .so(res => console.log(res))
            .grab(err => panel.log(err))
            }          return(
            <div>
            <button onClick={() => handleClick()}>Upload File</button>
            </div>
            )
}          consign default App;
At present run the client app.
$ yarn get-go And at present click on the Upload File button, this will phone call our lambda role and put the file on our S3 bucket.
Congrats! Y'all have successfully washed the process of uploading JSON files in S3 using AWS Lambda. This was a very long journey. I promise your time is not wasted. You lot have learned something new. I capeesh your effort.
ramboweireaddes2000.blogspot.com
Source: https://javascript.plainenglish.io/a-complete-guide-to-upload-json-file-in-s3-using-aws-lambda-bb14112ee2b6
0 Response to "Npm Aws-s3 Upload Json Object to S3"
Post a Comment